 I wrote about the tortuous path I took to building a new home server in an earlier post. Now I’m actually going to take the opportunity to document the build.
First off, the parts list:
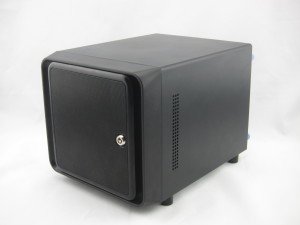
- NORCO ITX-S4 Black Server Case 115123205
- ASRock AM1B-ITX AM1
- AMD Sempron 3850 Kabini Quad-Core 1.3GHz APU
- Crucial Ballistix 4GB 240-Pin DDR3-1600 SDRAM
- Crucial MX100 256GB SSD
- EVERCOOL 50mm * 10mm Fan
- ARCTIC F8 PWM Fluid Dynamic Bearing Case Fan, 80mm
- BitFenix Alchemy Multisleeve 4-Pin 45cm Molex Extension Cable – White
- Monoprice 18inch SATA 6Gbps Cable w/Locking Latch – Blue
My goal was to have an inexpensive, capable, efficient, compact machine to run as a home server as an upgrade to some older Marvel Kirkwood based servers I have. Intel’s BayTrail Celeron CPUs were an interesting option, but I chose to go with an AMD Kabini APU, for a few reasons. Formost among them, it was available as part of a $100 bundle with a case and a motherboard with four 6Gbps SATA channels, rather than the two common on BayTrail boards.
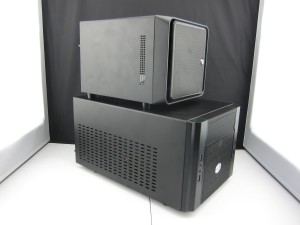
Unfortunately, the Cooler Master Elite 130 case in the bundle was bigger than I really wanted, so I ended up spending another $100 to get a Norco ITX-S4.
Unfortunately, the ITX-S4 required further upgrades and part-swapping. The stock fan was amazingly loud at full speed, and because it was a 3-pin fan, couldn’t be regulated by my motherboard, so it was loud all the time. I ended up replacing it was a Arctic F8 PWM fan. The new fan is quieter, at full speed, and I set up a custom fan profile in the motherboard BIOS so it spends most of its time turning even more slowly and quietly.

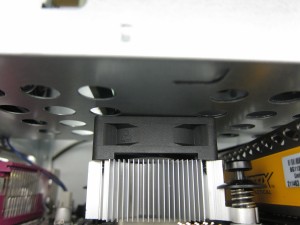 A bigger issue is that there wasn’t enough clearance between the stock CPU fan and the bottom of the hard drive cage, which made it impossible to install the motherboard.
I was able to fit it in by removing the hard drive cage, but this resulted in about 1mm of clearance between the top of the can and the bottom of the drive cage.
I considered many options. The AM1 platform used by the socketed Kabini chips like the Sempron I used is still relatively new, and its a low cost platform, so 3rd parties haven’t been rushing to produce aftermarket heatsinks. I looked at the possibility of modifying a heatsink intended for another application, and considered grinding 5mm off the stock heatsink.
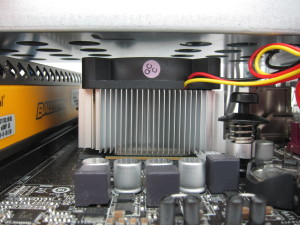 I finally realized that the stock fan was 15mm thick, and so I fitted a 10mm fan instead. Cheap and easy, so I did it. This seems to work pretty well, but I’m considering either cutting a hole in the bottom of the drive cage to improve airflow, a wider, lower-profile heatsink with a larger fan, or making some sort of baffle to improve airflow so I can keep the chip cool at lower quieter fan speeds.
Overall, I’m going to have to give mixed marks to the ITX-S4 case. I like the size, and the looks, but there are a number of downsides. In addition to the noisy stock fan, the build-quality is kind of mixed. The sides bow a bit, but the biggest issue is the drive trays. The latching levers feel a little flimsy. I worry I’m going to break something when I insert or remove them.
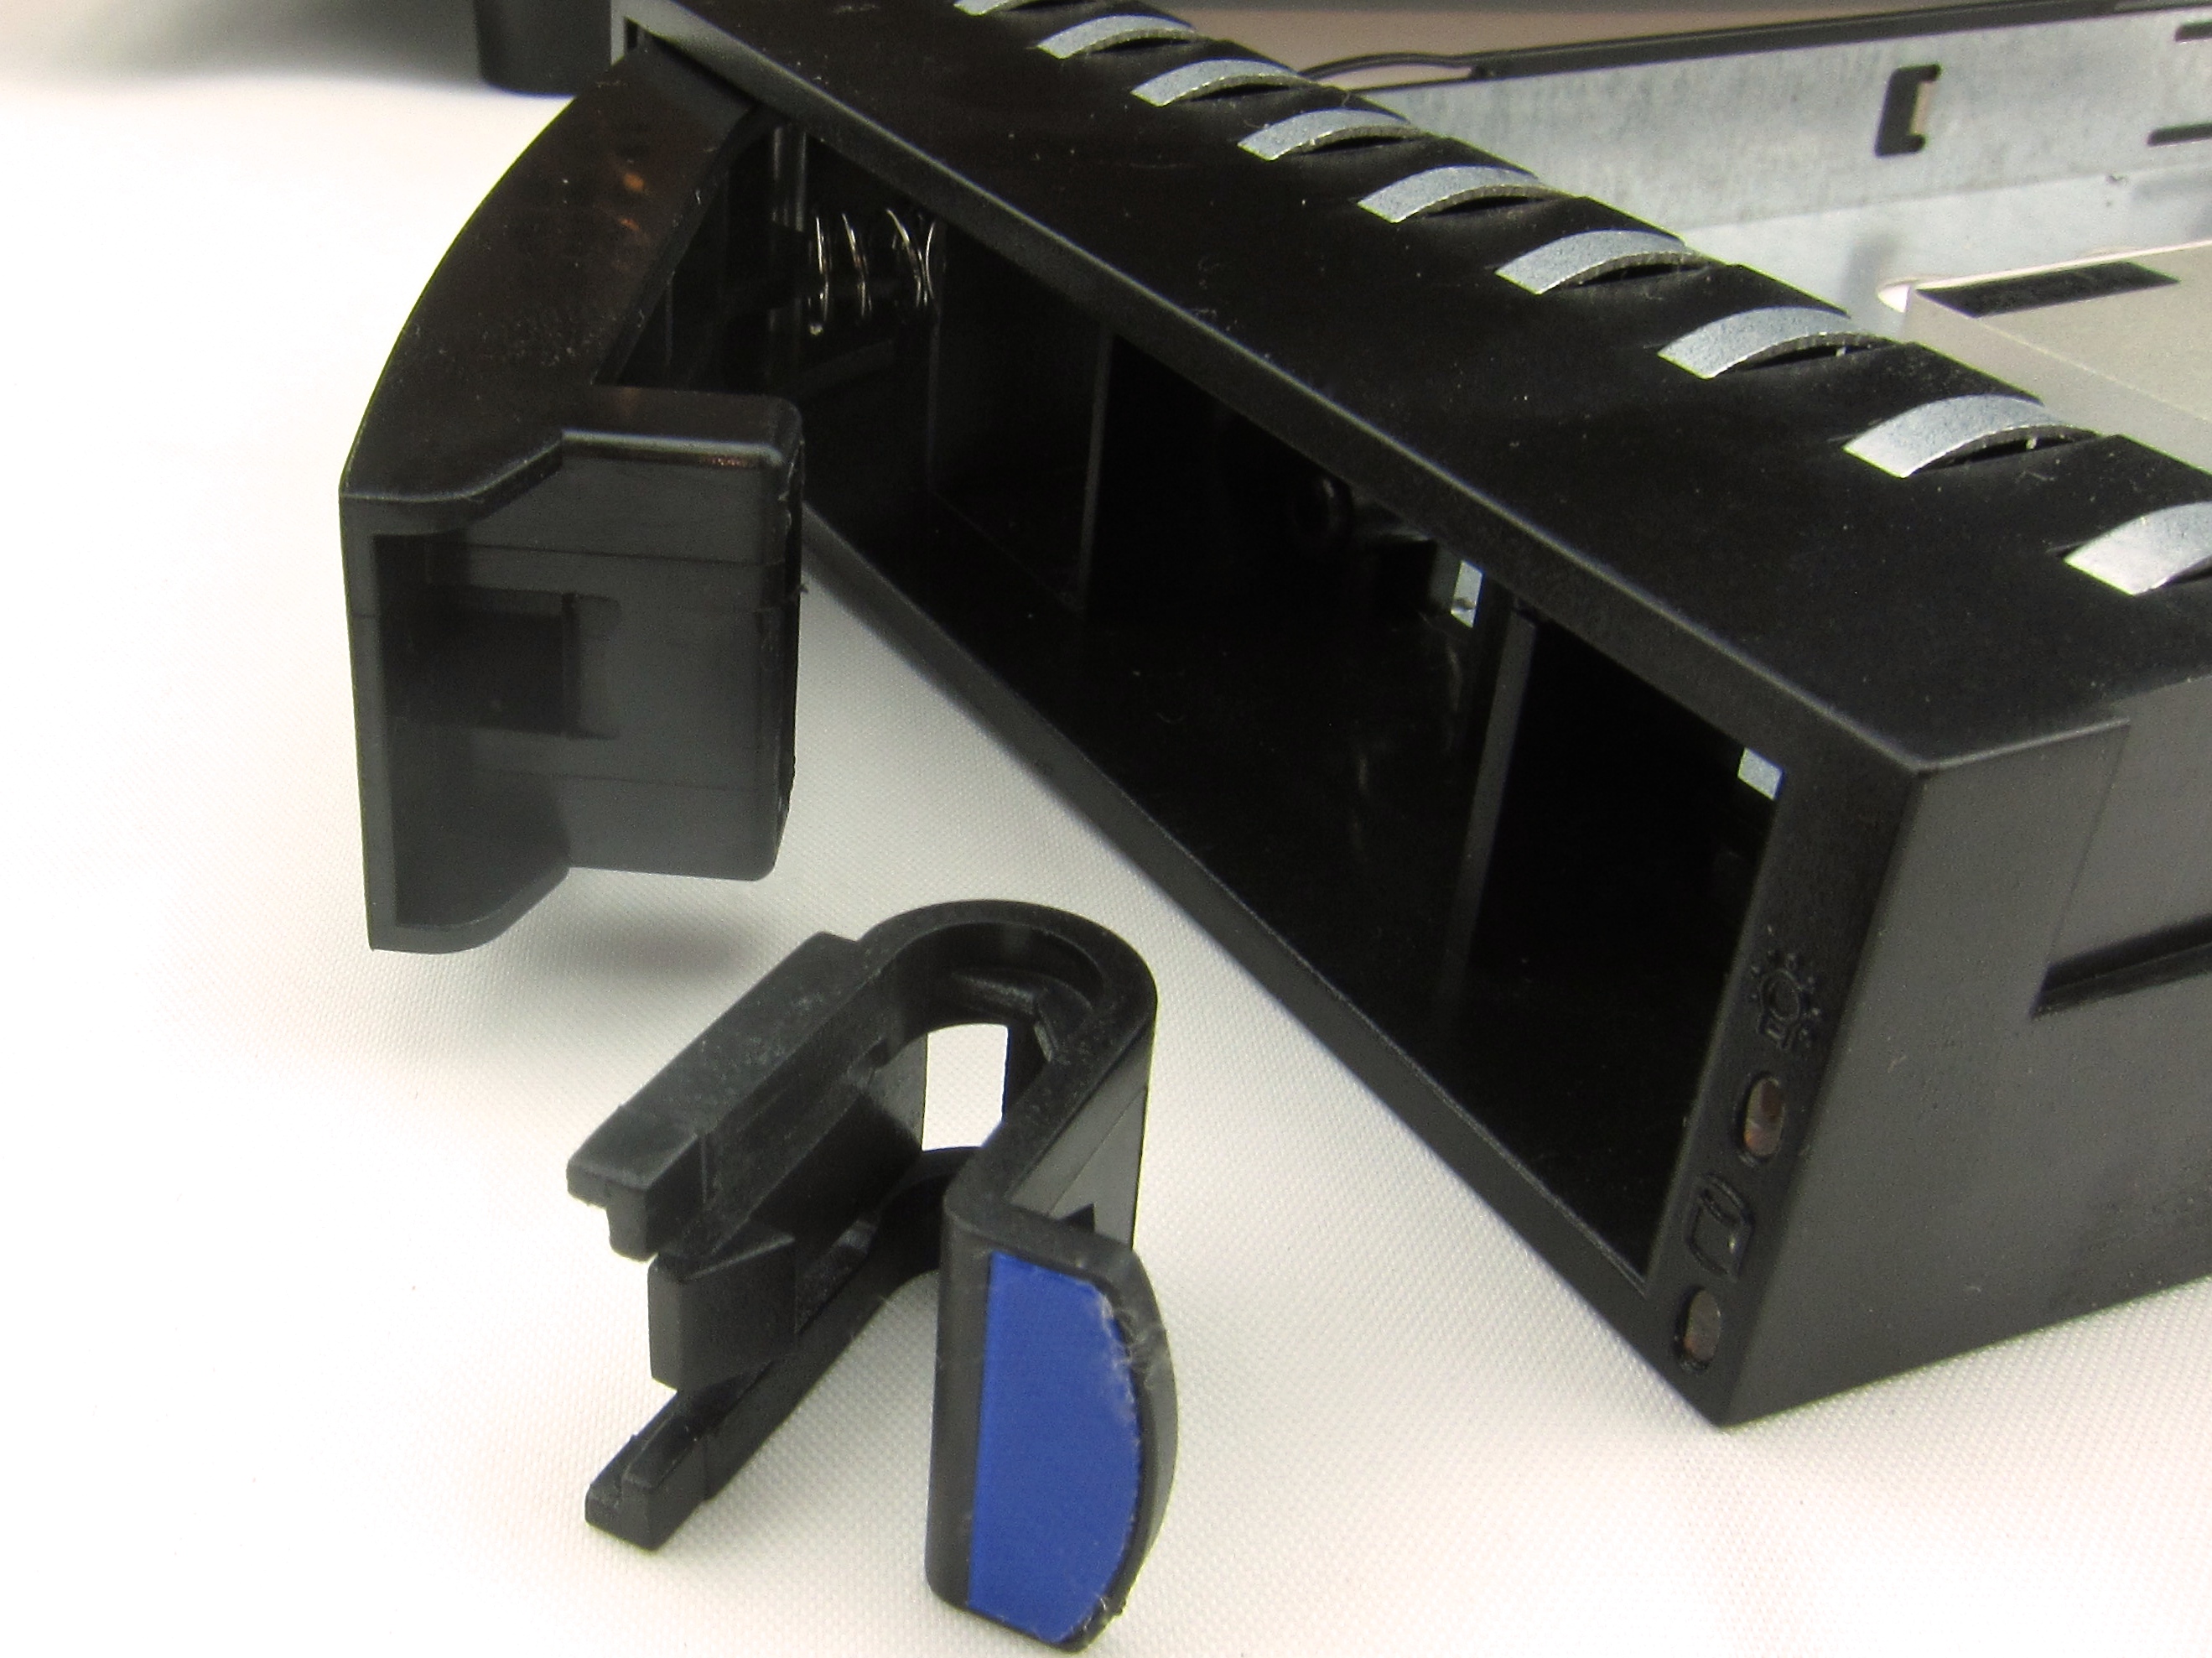 Even worse, the latches that are supposed to hold the levers closed keep slipping free of the levers. This has happened at least once to each of the four drive trays. If it happens again I’m going to need to resort to some superglue. This is completely unacceptable for a $100 case!
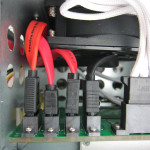
A few more notes on things that didn’t work out as expected. I purchased an IO Crest 2 Port SATA III PCI-Express x1 Card so that I had an extra SATA channel available to take advantage of an internal SSD bracket, saving the drive bays for 3.5″ drives. Unfortunately, the machine resets during the linux boot process, shortly after identifying devices connected to the card, so I’ve set it aside for now.
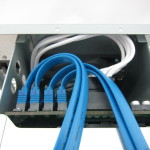
I also tried Rosewill 19.7″ Serial ATA III Blue Round Cables, thinking that the round cables would be easier to route. They weren’t. First off, I missed the fact that the ones I bought have 90° connectors on one end, which doesn’t work given the configuration of ports in the drive cage. In addition, the 180° connectors were too thick for the close spaced SATA ports on the the motherboard. Moreover, the cables were still quite thick and stiff. I found it easier to use standard flat SATA cables. Some of the ones I had on hand were a tight fit because of the length of the molded connectors, so I picked up some matching cables with shorter connectors.
Overall, I’m pretty happy with the way the project turned out so far. With a 3.5″ Western Digital Green HDD, two surplus laptop drives (one 7,200 RPM the other 5,400), and the SSD, it idles at about 25W. With cpuminer and sgminer mining litecoins on the CPU and GPU, respectively, it uses ~45W. At full-load on a warm day the fans are a little noisy, in particular, the CPU fan has to spin at nearly full speed, (4,500 RPM), to keep it under 60°C, otherwise the CPUs thermal throttling will kick in, which seems to shave ~5W off the load by dropping the CPU and GPU clocks by 20% or so.
Next step is to install Debian and migrate over data and services from my old server. In the longer run, I may revise this build with a BayTrail build for lower power consumption and noise.
Pingback: ASRock AM1B-ITX + AMD Kabini Sempron 3850 Linux Notes | Tech Obsessed
Pingback: Berries, Bananas, Oranges and C.H.I.P.s | Tech Obsessed